So this year (school year, as any mother of school-age kids measures her years), I have a lot I want to get done. I want to wrap up the onesie business completely, and I still have a couple of hundred onesies to print and list in my shop. It's a big job, and I've been chipping away at it. But I also have other things I want to do and need to do. Quilting projects, seasonal projects, etc. I first thought I would alternate days, onesies then other things. But I've decided it makes more sense to alternate each week. It cuts down on time I have to spend cleaning up and switching between each type of work.
Last week I worked diligently on finishing a mini quilt, putting together a napping size quilt and back, and making my halloween costume. It was a lot. I worked hard all week.
This week I need to get back to the business of onesies. It's also Halloween so I will be at the boys' school helping with festivities. This school year is going so dang fast, I can't believe it.
I had 3 quilts that I wanted to finish before Christmas, which was a huge goal, and I'm nearly done. The tops and backs are all done. I will send them to Sarah Russett, my long-arm quilter, and when she is done doing her excellent work, I will add the bindings and be done. Yay. Christmas gifts I'm excited to give, and a giant item checked off my to-do list. I'll post pictures of them after they have been given away.
The mini quilt I finished this week is a project inspired by this print by Hannes Beers. Last year the librarian at the boys' school mentioned that she was looking for things to hang on the library walls. I immediately remembered that print and thought it would be perfect for the library. I added to it a bit, and changed some elements. I made a stencil on my Silhouette and then painted it on white fabric. I did the quilting by hand. It was my first foray into hand quilting, and while I have no idea whether I did it "right," I enjoyed the process and I like the final look of the piece. I want to block it so it's a little more square, then add the hanging sleeve and it will be ready to give away. It was super satisfying to do a small quilt project intended to hang on the wall. I definitely will be doing more mini quilts in the future.
Showing posts with label craft. Show all posts
Tuesday, October 29, 2013
Tuesday, January 15, 2013
this year's ornaments
Christmas crafting! We tried three different things this year, with varying results.
I wanted to make these snowglobes. I found pictures of the boys in the snow and laminated them. I was so excited to put these together but they were duds. My problem was that I did not leave enough space around the inner edge of the lid, and the jars would not close. On one of the three, I could get the lid on, but it wouldn't seal, and so it leaked. I think I used the wrong kind of glue, for starters, and I may have been trying to cram too much stuff into each snowglobe. I was focused mainly on the look and how cute they would be with sprigs of this and that.... I should have been primarily concerned with whether the darn things would close. So, these potentially adorable snowglobes were a bust for us. Maybe we will try again next year.
Incidentally, one of the other moms in S's class wanted to to do snowglobes as the craft for the whole class during the winter party. So I was able to experience all the same technical difficulties, times twenty. I felt so bad as each kid walked away from the sink, which was my station, with either a leaky snowglobe or with one that wouldn't close at all. That was quite an afternoon.
These next ornaments we tried were these little wintery scenes. I think these turned out okay, even though some of our trees and deer dried at a crooked angle. The tricky part of these was not getting glue all over the stuffing that we used for the snow. And also keeping the stuffing inside the cup as you put it over the top of the scene. So these took a bit of dexterity and patience. Because of that they weren't very kid-friendly. I had to do most of the work myself, which isn't the idea. But they made cute gifts for teachers and grandparents. I love the one we kept for our tree.
Lastly, we made these sparkly snowflakes. These were super easy for the boys, but it took a surprisingly long time to do 5 beads per pipecleaner. Turning on some tv as a distraction helped us get through it. We made most according to the directions, but I also tried one version where I kept the pipecleaners longer and then I curled them to make a more flowery look.
Next year I'm going to try to limit myself to one or two ornaments, and I'll try to pick ones that will be a little easier for the boys. The whole point is to do these WITH them, not for me to slave away after they've gone to bed.
One more thing I did this year. I used our box advent calendar again, but this year I put magnets on the backs of the boxes. In the past I had hung them on a door or wall using poster putty. But it never worked very well. We would often have boxes falling down and their contents spilling out. The magnets worked much better. I put them all on a cookie sheet from IKEA. Voila. No more falling boxes.
Just for fun, a few pictures of our decorations this year. I love the mantle in our apartment.
I wanted to make these snowglobes. I found pictures of the boys in the snow and laminated them. I was so excited to put these together but they were duds. My problem was that I did not leave enough space around the inner edge of the lid, and the jars would not close. On one of the three, I could get the lid on, but it wouldn't seal, and so it leaked. I think I used the wrong kind of glue, for starters, and I may have been trying to cram too much stuff into each snowglobe. I was focused mainly on the look and how cute they would be with sprigs of this and that.... I should have been primarily concerned with whether the darn things would close. So, these potentially adorable snowglobes were a bust for us. Maybe we will try again next year.
Incidentally, one of the other moms in S's class wanted to to do snowglobes as the craft for the whole class during the winter party. So I was able to experience all the same technical difficulties, times twenty. I felt so bad as each kid walked away from the sink, which was my station, with either a leaky snowglobe or with one that wouldn't close at all. That was quite an afternoon.
These next ornaments we tried were these little wintery scenes. I think these turned out okay, even though some of our trees and deer dried at a crooked angle. The tricky part of these was not getting glue all over the stuffing that we used for the snow. And also keeping the stuffing inside the cup as you put it over the top of the scene. So these took a bit of dexterity and patience. Because of that they weren't very kid-friendly. I had to do most of the work myself, which isn't the idea. But they made cute gifts for teachers and grandparents. I love the one we kept for our tree.
Lastly, we made these sparkly snowflakes. These were super easy for the boys, but it took a surprisingly long time to do 5 beads per pipecleaner. Turning on some tv as a distraction helped us get through it. We made most according to the directions, but I also tried one version where I kept the pipecleaners longer and then I curled them to make a more flowery look.
Next year I'm going to try to limit myself to one or two ornaments, and I'll try to pick ones that will be a little easier for the boys. The whole point is to do these WITH them, not for me to slave away after they've gone to bed.
One more thing I did this year. I used our box advent calendar again, but this year I put magnets on the backs of the boxes. In the past I had hung them on a door or wall using poster putty. But it never worked very well. We would often have boxes falling down and their contents spilling out. The magnets worked much better. I put them all on a cookie sheet from IKEA. Voila. No more falling boxes.
Just for fun, a few pictures of our decorations this year. I love the mantle in our apartment.
Friday, November 9, 2012
finally did something with the beautiful leaves we made 4 years ago
I wrote a post about this garland I made over on my tumblr. Are you guys following me there too? Because I plan to start posting more over there, mostly the things that I make. Click over, friends!
xoxo
Labels:
autumn,
craft,
fall,
garland,
leaf,
leaf rubbings,
leaves,
tumblr,
watercolor
Friday, June 15, 2012
a few stenciled shirts
I've been stenciling shirts in the evenings when Nate is gone, instead of watching tv. It makes me feel productive and occupied instead of lazy and lonely. I made three for T, birthday gifts (which I had to give him early because he caught me looking at the photos), one for S, and one for myself.
Sokka, Aang, and Appa are all characters from Avatar: The Last Airbender. Are you guys watching that show yet? You should watch it; it's so good! Appa is my favorite of these stencils. I also love how T's Calvin and Hobbes shirt turned out.
Here's a picture of T dressed up like a "war guy." Because we'll undoubtedly be moving to a smaller space, I've been trying to decide what we can bring with us and what we can't. There are a couple boxes of costumes and dress-up accessories in the closet that probably won't be coming with us. The boys almost never play with them, but then once in a while the cousins will come over, and everybody will come downstairs in the most hilarious costumes. So I hate to leave them behind when I think of those funny play sessions. But this picture gives me hope that the creative play will continue, with or without actual costumes. This "costume" consists of undies over shorts, pj shorts on his arms, socks on his hands, and a crushed soda bottle as his weapon.
This weekend we are driving to Michigan for a little family reunion. Last time this event happened, Nate and I were attending a wedding, so my family took the boys without us. I'm looking forward to seeing all the relatives I missed seeing 2 years ago, and also to trying out the famous zip line that the boys raved about after their first trip to this camp. Camera battery is charging as we speak, I'll try to come back with some pictures and stories!
xoxo
![]() |
| Calvin and Hobbes shirt, for T. |
![]() |
| Sokka shirt, for S. |
![]() |
| Aang shirt, for T. |
![]() |
| Calvin and Hobbes inverse stencil shirt, for me. |
| Appa shirt, for T. |
Here's a picture of T dressed up like a "war guy." Because we'll undoubtedly be moving to a smaller space, I've been trying to decide what we can bring with us and what we can't. There are a couple boxes of costumes and dress-up accessories in the closet that probably won't be coming with us. The boys almost never play with them, but then once in a while the cousins will come over, and everybody will come downstairs in the most hilarious costumes. So I hate to leave them behind when I think of those funny play sessions. But this picture gives me hope that the creative play will continue, with or without actual costumes. This "costume" consists of undies over shorts, pj shorts on his arms, socks on his hands, and a crushed soda bottle as his weapon.
This weekend we are driving to Michigan for a little family reunion. Last time this event happened, Nate and I were attending a wedding, so my family took the boys without us. I'm looking forward to seeing all the relatives I missed seeing 2 years ago, and also to trying out the famous zip line that the boys raved about after their first trip to this camp. Camera battery is charging as we speak, I'll try to come back with some pictures and stories!
xoxo
Thursday, May 31, 2012
a finished quilt, plus M O V I N G
I finished the first story quilt a few weeks ago. I quilted it with straight lines at random intervals. They actually weren't all that straight, and some of them even cross over each other, but I kind of like their imperfect look.
On the back I used this awesome chevron print I found on etsy. I get most of my fabric on etsy, actually. I wanted to include an explanation of how to use the quilt on the back... I made a stencil on my Cameo Silhouette, painted it onto some fabric, and then incorporated that block into the back of the quilt. This was a pretty time consuming process, but I am happy with how it turned out. For all subsequent story quilts I make, though, I have a more efficient solution. I had some fabric printed by Spoonflower that says the same thing. I love how it looks and can't wait to show you on the next quilt! I added some colorful binding and called it done! Love it. Can't wait to send it to its new home.
It's hard to imagine when I might have time to make another quilt. Life is going to be dominated by one giant project for the foreseeable future, because..... we are moving! Nate took a new job in the suburbs of Chicago. We have wanted to move back to Chicago since the day we left, almost 6 years ago. So we are excited. But also sad to leave family and good friends here. And also overwhelmed by the gigantic task of selling a house and moving. It's going to be a lot of work. It already has been a ton of work to get the house ready for showings. We have had loads of help from family already, and I'm sure we'll need more help before this process is over. A challenging time ahead of us... lots of work to accomplish, many emotions to sift through, and a new life to create once we reach the other side. It's really happening!
On the back I used this awesome chevron print I found on etsy. I get most of my fabric on etsy, actually. I wanted to include an explanation of how to use the quilt on the back... I made a stencil on my Cameo Silhouette, painted it onto some fabric, and then incorporated that block into the back of the quilt. This was a pretty time consuming process, but I am happy with how it turned out. For all subsequent story quilts I make, though, I have a more efficient solution. I had some fabric printed by Spoonflower that says the same thing. I love how it looks and can't wait to show you on the next quilt! I added some colorful binding and called it done! Love it. Can't wait to send it to its new home.
It's hard to imagine when I might have time to make another quilt. Life is going to be dominated by one giant project for the foreseeable future, because..... we are moving! Nate took a new job in the suburbs of Chicago. We have wanted to move back to Chicago since the day we left, almost 6 years ago. So we are excited. But also sad to leave family and good friends here. And also overwhelmed by the gigantic task of selling a house and moving. It's going to be a lot of work. It already has been a ton of work to get the house ready for showings. We have had loads of help from family already, and I'm sure we'll need more help before this process is over. A challenging time ahead of us... lots of work to accomplish, many emotions to sift through, and a new life to create once we reach the other side. It's really happening!
Wednesday, May 9, 2012
wonderful quilty distraction
I've been working on some quilts lately. A couple weeks ago I was working obsessively on them, at the expense of every other area of my life. Then I reached a point where I could no longer ignore the house, the laundry, or the mounting onesie orders. So the quilts went on a short break. But now I'm caught up on onesies, and the house isn't a super disaster right now, just a regular disaster, so the quilts are coming back out. I consciously made this decision because I need a distraction for the next couple of days. See, Nate has an interview tomorrow. For a job near Chicago. So at this point there is a slight chance that we could be moving back. We've been down this road before and been disappointed by the outcome, so I'm trying hard not to get worked up. I'm trying not to even think about it at all because 1. so much excitement I can hardly keep from jumping up and down and squealing and 2. tons of anxiety about the logistics of moving, especially packing up this huge house and moving to a much smaller one. Also 3. no point in feeling excited or nervous until the thing actually happens. Which is hasn't yet. So. That is my life at the moment. Trying not to think about the thing I've been hoping for/dreaming of for six years now. Quilts to the rescue!
I have had plans to make these story quilts for several years now. I've been slowly collecting and cutting novelty fabrics into squares. Six months ago I bought enough backing fabric to construct three of these bad boys, two for friends and one for us. And I finally cut into that fabric a couple weeks ago. One thing I will say for myself is that even if it takes a super long time, I do usually follow through on a plan. What does your workspace look like when you quilt and also sell onesies? Something like this. A big fat mess.
The pattern is from this book. The idea is to use the paths (the straight lines) to move to the pictures (cut from all the novelty prints) and tell a story as you go. You can tell a new story every time, because you take a different path or interpret a picture in a new way. I fell in love with this idea. It's right in my wheelhouse as far as believing that childhood is a time for simple pleasures and creative play. It's entirely possible that nobody will use these quilts as intended. My own boys might only use theirs as a way to keep warm while playing video games (cringe). But I like that these quilts could possibly spark a child's imagination, and I'm going to cling to that even if it is a delusion.
So I have one completely pieced (the top is all sewn together), and the other is nearly pieced. Then I just have to make the quilt sandwiches (easier said than done, as I'll have to actually sweep and mop the floor so I have a clean place to lay them out), and start quilting! I bought myself a walking foot to make the quilting easier. I'm going with simple straight line quilting, no free motion experimentation this time around.
I had tons of fun shopping for the fabric for these quilts. The background fabrics were fun to pick out but the novelty prints were ridiculously fun. Too fun. Do you guys know how many adorable novelty prints are out there? A LOT. Fabrics that I would probably never be drawn to for another project were perfectly suited to these story quilts. I had a hard time stopping. In fact I still haven't stopped, even though I have more than enough for these three quilts, and many more after that. I'm hoping to make one for my nieces and nephews (one per family), and probably some other friends too. Hopefully I'll be showing you a finished project pretty soon. In the meantime, here are some of my favorite story squares. They are so cute. I mean, a raccoon building a brick wall. COME ON.
I have had plans to make these story quilts for several years now. I've been slowly collecting and cutting novelty fabrics into squares. Six months ago I bought enough backing fabric to construct three of these bad boys, two for friends and one for us. And I finally cut into that fabric a couple weeks ago. One thing I will say for myself is that even if it takes a super long time, I do usually follow through on a plan. What does your workspace look like when you quilt and also sell onesies? Something like this. A big fat mess.
The pattern is from this book. The idea is to use the paths (the straight lines) to move to the pictures (cut from all the novelty prints) and tell a story as you go. You can tell a new story every time, because you take a different path or interpret a picture in a new way. I fell in love with this idea. It's right in my wheelhouse as far as believing that childhood is a time for simple pleasures and creative play. It's entirely possible that nobody will use these quilts as intended. My own boys might only use theirs as a way to keep warm while playing video games (cringe). But I like that these quilts could possibly spark a child's imagination, and I'm going to cling to that even if it is a delusion.
So I have one completely pieced (the top is all sewn together), and the other is nearly pieced. Then I just have to make the quilt sandwiches (easier said than done, as I'll have to actually sweep and mop the floor so I have a clean place to lay them out), and start quilting! I bought myself a walking foot to make the quilting easier. I'm going with simple straight line quilting, no free motion experimentation this time around.
I had tons of fun shopping for the fabric for these quilts. The background fabrics were fun to pick out but the novelty prints were ridiculously fun. Too fun. Do you guys know how many adorable novelty prints are out there? A LOT. Fabrics that I would probably never be drawn to for another project were perfectly suited to these story quilts. I had a hard time stopping. In fact I still haven't stopped, even though I have more than enough for these three quilts, and many more after that. I'm hoping to make one for my nieces and nephews (one per family), and probably some other friends too. Hopefully I'll be showing you a finished project pretty soon. In the meantime, here are some of my favorite story squares. They are so cute. I mean, a raccoon building a brick wall. COME ON.
Tuesday, February 7, 2012
this year's valentine crafts!
We finished our Valentine's projects a week early this year, amazingly. This is T's collection box to take to school. It was mainly inspired by this project that I saw on The Crafty Crow. We used a tissue box. Instead of covering it with yarn, which I thought looked too time consuming, I opted to cover it with hundreds of paper circles. Much more efficient! Honestly, though, it didn't take that long. I was kind of rolling my eyes at myself when I started, like, really? This is how you want to spend your whole Sunday, Laura? But it was kind of relaxing, mindlessly gluing them all on. I didn't do any kind of pattern or neat rows, just kept it totally random, so that it would look like my kindergartener had possibly helped me with it. He didn't. He started out helping, and was doing a great job, but we soon figured out that a glue stick wasn't going to make the circles stick. So I switched to the hot glue gun and T couldn't help anymore. He did cheer me on. I was surprised to look up after an hour of hot gluing and realize all four sides were well covered. Not bad! The rock eyes were painted by me, as directed by T. I used pipecleaners to make the arms/hands and hot glued them on to the sides. More blue dots to cover the ends of the pipe cleaners and waa-laa. Finito. We're crazy about this guy.
And here are the boys' Valentine's to pass out. Saw this idea on Pinterest; the link went back to this blog. I don't think ours turned out quite as well as the inspiration. I should have cropped them so that the hands were bigger. Also, the boys were not very cooperative about striking the arm-outstretched-fist-clenched pose. It is so hard to take good pictures of them. I totally missed the day of parenting school that covered how to make your kids cooperate for photos. Mine are generally terrors in this situation. Getting them to keep their eyes open (not because they're accidentally blinking, but because they are rolling their eyes to the back of their heads. On purpose) and keep their tongues in their mouths is a serious feat. Asking them to stretch out a fist like they're holding a sucker? That is a bridge too far. So these were the best we got. T for some reason doing two fists, and S with his fist right under his face instead of off to the side. Neither one of them stretched out very far. I spent too much time angling each sucker so that it wasn't in front of their faces. Then I put a piece of tape on the back of each one to secure the sucker, but I have a feeling that by the time these get to school, the suckers will be all over the place. Oh well. The important thing is that they're done, the boys like them, and hey, everyone will get a sucker.
Monday, August 22, 2011
the grind. back to it.
The boys are back to school. This year we have a third grader and a kindergartener. Insert cliche but all-too-true statement about time flying here.
I feel like our summer was so busy. A little too busy. There is a balance to be found between free time and scheduled time, and I feel like we erred on the side of too scheduled this summer. It's okay, though. I still think the boys had fun. And we ended the summer with a great visit to Chicago, which was wonderful as always. Perhaps next year we'll sign up for fewer activities. That's so far away now, who knows what I'll remember to do.
We are adjusting to our new school schedule pretty well. We drop S off at 8 am, then T and I run errands, do chores, or just play in the morning. Then I take T to kindergarten after lunch, and the afternoons are MINE ALL MINE. So far I've been hiding myself away at home, reading and crafting and cleaning (summer left the house a total mess). I love my alone time, I do. Soon enough I'll be spending some of my afternoons teaching art lessons to the boys' classes, or perhaps having lunch with some girlfriends. For now it's hermit time every afternoon.
Okay, listen up. I'm sure you already know this, but I've opened up a second little etsy shop selling stenciled onesies. It's called The Onesie. Smiley face.
Here is the story behind my new little venture: Last year friends of ours adopted a gorgeous baby boy. At the time I was making tons of cute onesies for my newest nephew, cutting out words and images using a Cricut machine. I was on an adorable roll. I wanted to make one for our friends' new baby, but I didn't want to make it too cutesy. See, our friend Brian, the baby's dad, is like the baddest badass I've ever known, a Chicago cop and all-around tough guy. I wanted to make a onesie that wouldn't make Brian cringe when he changed his boy's diaper. So I came up with a little phrase, "I just got here and I'm already awesome." You can see that original onesie here.
Okay, so then a year later I noticed my flickr stats for that particular photo were blowing up. Like, hundreds of views a day. I traced all this action back to Pinterest, and then I though, well, if all these people on Pinterest love it, maybe some of them will buy it. And so my etsy shop was born. I'm putting up onesies with lots of different phrases, but so far my best seller is the one I made for Brian's baby boy. So thanks, Brian, for being too manly for the average cute onesie. I owe you.
Please, if you need a baby gift or know someone who does, feel free to peruse my onesie selection! xoxo
| two cutie pies, ready for school. third grade and kindergarten! |
I feel like our summer was so busy. A little too busy. There is a balance to be found between free time and scheduled time, and I feel like we erred on the side of too scheduled this summer. It's okay, though. I still think the boys had fun. And we ended the summer with a great visit to Chicago, which was wonderful as always. Perhaps next year we'll sign up for fewer activities. That's so far away now, who knows what I'll remember to do.
| watching the polar bear at Lincoln Park Zoo. |
| T, Lili, and giraffes! |
| got drenched during our zoo visit. |
| silly cereal face. |
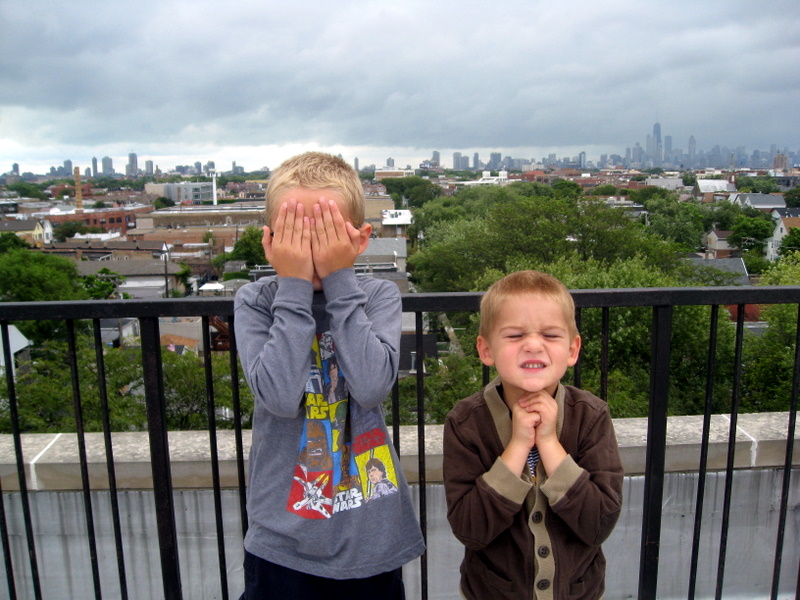
| sweet silly boys on a Chicago rooftop. |
We are adjusting to our new school schedule pretty well. We drop S off at 8 am, then T and I run errands, do chores, or just play in the morning. Then I take T to kindergarten after lunch, and the afternoons are MINE ALL MINE. So far I've been hiding myself away at home, reading and crafting and cleaning (summer left the house a total mess). I love my alone time, I do. Soon enough I'll be spending some of my afternoons teaching art lessons to the boys' classes, or perhaps having lunch with some girlfriends. For now it's hermit time every afternoon.
Okay, listen up. I'm sure you already know this, but I've opened up a second little etsy shop selling stenciled onesies. It's called The Onesie. Smiley face.
Here is the story behind my new little venture: Last year friends of ours adopted a gorgeous baby boy. At the time I was making tons of cute onesies for my newest nephew, cutting out words and images using a Cricut machine. I was on an adorable roll. I wanted to make one for our friends' new baby, but I didn't want to make it too cutesy. See, our friend Brian, the baby's dad, is like the baddest badass I've ever known, a Chicago cop and all-around tough guy. I wanted to make a onesie that wouldn't make Brian cringe when he changed his boy's diaper. So I came up with a little phrase, "I just got here and I'm already awesome." You can see that original onesie here.
Okay, so then a year later I noticed my flickr stats for that particular photo were blowing up. Like, hundreds of views a day. I traced all this action back to Pinterest, and then I though, well, if all these people on Pinterest love it, maybe some of them will buy it. And so my etsy shop was born. I'm putting up onesies with lots of different phrases, but so far my best seller is the one I made for Brian's baby boy. So thanks, Brian, for being too manly for the average cute onesie. I owe you.
Please, if you need a baby gift or know someone who does, feel free to peruse my onesie selection! xoxo
Tuesday, May 10, 2011
The hardest thing I've ever tried to do.
I am making another quilt. But I am trying a new-to-me technique, free motion quilting. I recently took a class on fmq, and this is the first time I'm trying to use what I learned. It is so hard. So much harder than I expected. It's basically like using your sewing machine to draw on the quilt. You can create any shape or pattern with the stitches. You completely control the movement with your hands. When I looked at my quilt I could envision where I wanted the stitches to go. But when I actually got the quilt under the needle, I had a lot less control than I would have hoped. Lines that are meant to be curved are pointy. Lines that are meant to be smooth are jagged. By the looks of these stitches, you would think a small child was sitting at my sewing machine. No kidding. Part of me can't believe I am giving this quilt away. It's a baby gift for a friend. I should have practiced on something that wouldn't be seen by anyone else. I did practice, actually, quite a lot, on scraps. But it certainly wasn't enough. Oh well. At the very least this quilt will have a uniform look, messiness across the board. Plus, it will still keep a baby warm, and the fabrics are super cute. So I will try not to be too embarrassed when I give it away. I am getting better, I think, very slowly. And it's exciting to think about a point in the future when I might actually be good at this. For now it remains extremely challenging.
Two ladies are helping me, via their blogs, to get through my first experiment in free motion quilting. The first happens to be a lady who has seen me give birth. Christina was a young, compassionate doula when we had S in Chicago. She was our advocate and encourager during that horrible hospital birth. Now she is a midwife and mother in Portland, and a very accomplished quilter. She hosted a quilt-a-long on her blog last year, exploring all the different options of free motion techniques. Those posts didn't mean much to me at the time, but now I am pouring over them and soaking up her knowledge, pointers, and humor. She was even so kind as to share some pictures of her first free-motion work, and guess what! It looks A LOT like mine does now! So I have hope that I will get better at this, just like she did.
The second lady is Leah Day, who is posting hundreds of free motion designs, along with videos of how to stitch them, on her blog. It's super helpful to watch the videos instead of just trying to figure out how to stitch something just by looking at it. Also she organizes her designs by difficulty level, so I am spending a lot of time studying the Beginner page.
Here you can see Leah's design River Path. It's one of the most attractive fmq designs I've seen, so I sure hope I can improve upon my initial attempt.
And here is Christina's pebbling. Look how neat and tidy those circles are! How does she do that?!
I'll be back later to share this quilt when it is finished, and hopefully with some more quilts over the summer. That's all for now. I'll leave you with some cute pictures of me and my boys on Mother's Day.
Two ladies are helping me, via their blogs, to get through my first experiment in free motion quilting. The first happens to be a lady who has seen me give birth. Christina was a young, compassionate doula when we had S in Chicago. She was our advocate and encourager during that horrible hospital birth. Now she is a midwife and mother in Portland, and a very accomplished quilter. She hosted a quilt-a-long on her blog last year, exploring all the different options of free motion techniques. Those posts didn't mean much to me at the time, but now I am pouring over them and soaking up her knowledge, pointers, and humor. She was even so kind as to share some pictures of her first free-motion work, and guess what! It looks A LOT like mine does now! So I have hope that I will get better at this, just like she did.
The second lady is Leah Day, who is posting hundreds of free motion designs, along with videos of how to stitch them, on her blog. It's super helpful to watch the videos instead of just trying to figure out how to stitch something just by looking at it. Also she organizes her designs by difficulty level, so I am spending a lot of time studying the Beginner page.
| Struggling with my tension on the back. The thread is basically laying on the fabric. I've tightened it up a bit and it seems better. Still not great. |
| This is supposed to look like a design from Leah Day called River Path. Hers is beautiful and smooth and mine is, well, I guess it looks okay if you don't look too closely. |
| Here I am trying to do pebbling. Um...... yeah. Looks so simple and easy. Is not. |
And here is Christina's pebbling. Look how neat and tidy those circles are! How does she do that?!
I'll be back later to share this quilt when it is finished, and hopefully with some more quilts over the summer. That's all for now. I'll leave you with some cute pictures of me and my boys on Mother's Day.
Subscribe to:
Posts (Atom)